Front desk
Check-in and attendance
The front-desk check-in screen — QR card with a camera or USB scanner, phone number or member no., the coloured flags, refusing and letting in anyway — and the Attendance page with peak hours
Who it is for:OwnerManagerFront deskTrainer
On this page
The Check-in screen is the front desk's main screen; it opens by itself when a front-desk user signs in. Every entry is recorded, refused ones too, so the owner can see exactly who came in and who was let in despite a problem.
A tablet or laptop at the reception works best. You can scan with:
- the device's camera (Chrome on Android, ChromeOS or Mac),
- a USB or Bluetooth barcode scanner — it types the code into the box like a keyboard, or
- the keyboard: the member's phone number, member no. or name.
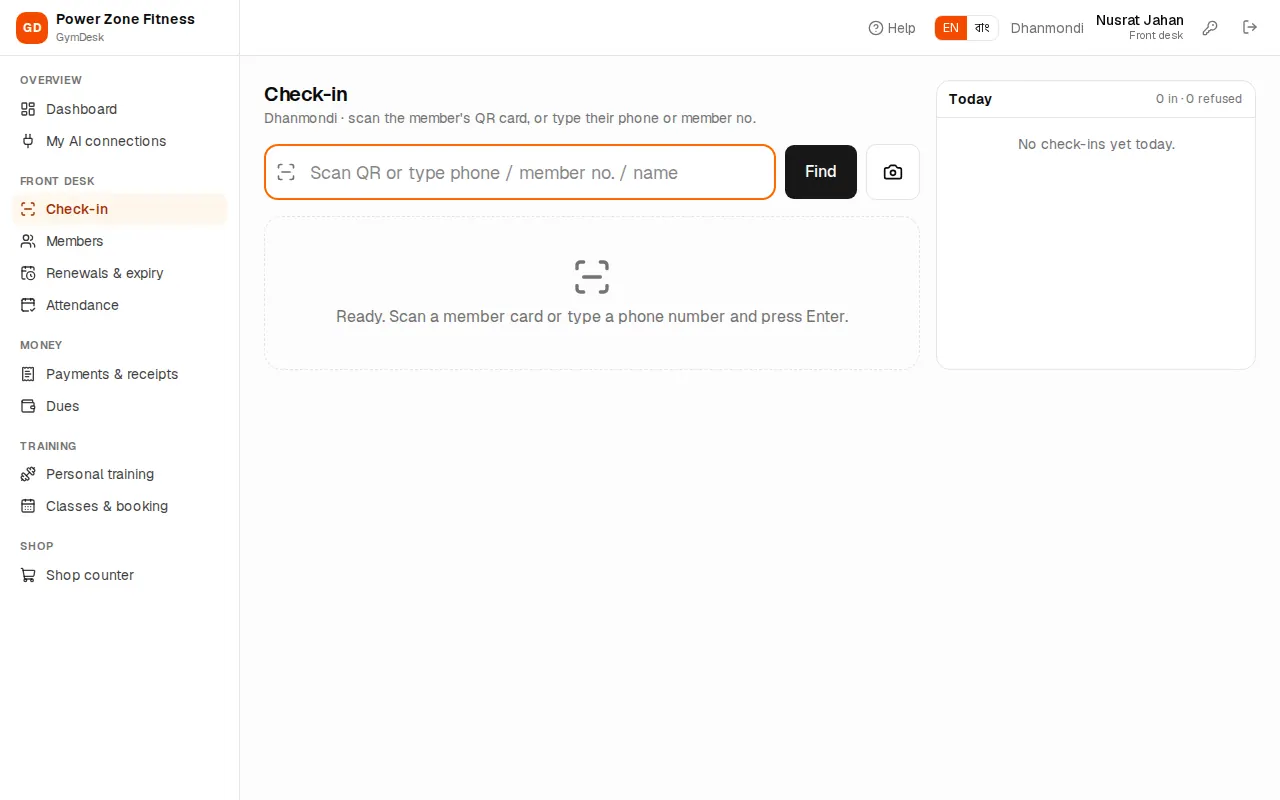
Checking a member in
- Open Check-in. The cursor is already in the big box.
- Scan the member's QR card (or their QR code on the member portal), or type their phone number or member no. and press Enter (or Find).
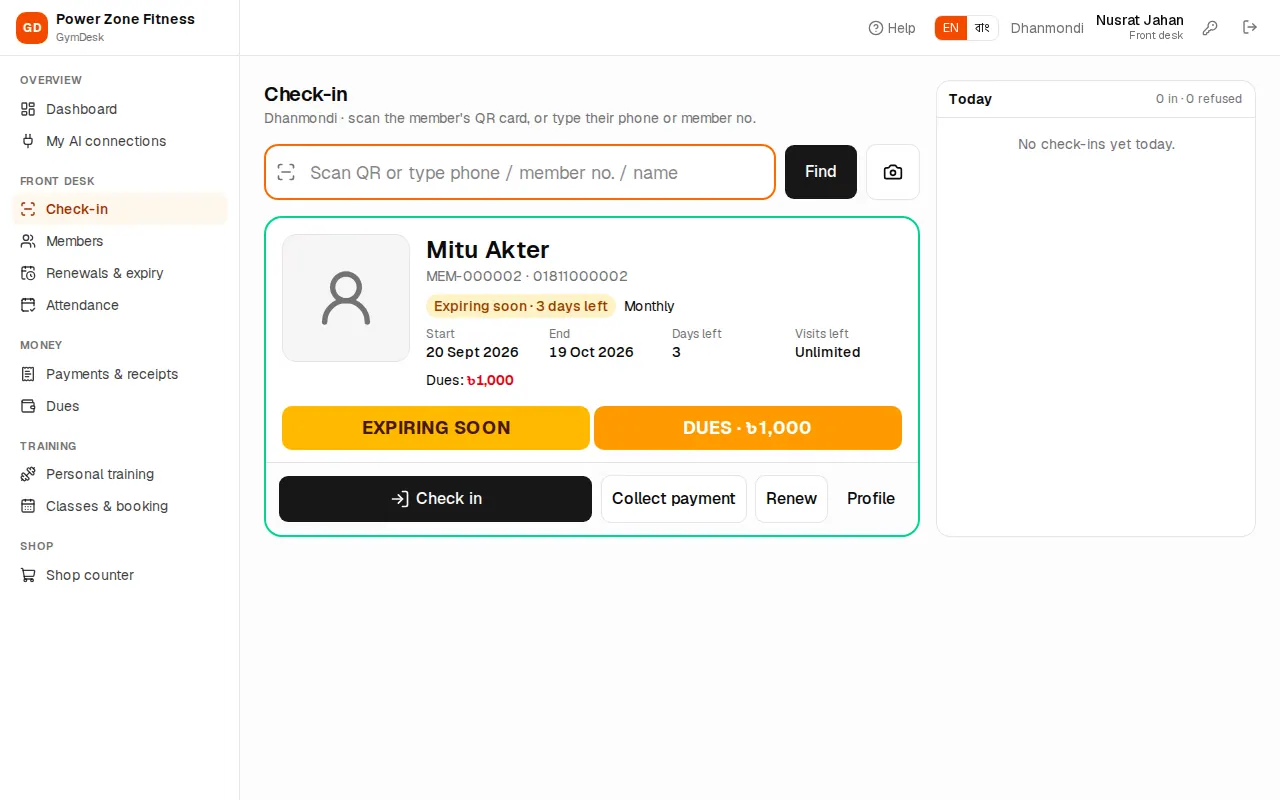
- The member card appears: photo, name, member no., phone, state, package, Start, End, Days left, Visits left, Dues, PT sessions left, health notes and today's earlier entries.
- Look at the coloured blocks:
- green OK TO ENTER — press Check in. The card turns green with IN.
- yellow or red flags — read them (below) and decide.
A QR scan of a member with no blocking flag checks them in straight away — the desk does not need to press anything. Typing a phone number always shows the card first.
If several members match (a family sharing a phone, or a name), "Several members match — pick one" appears; tap the right person. "No member found" means nothing matched — check the number or add the member.
Scanning the same member twice within 5 minutes does not create a second entry ("Already checked in a moment ago").
What the flags mean
| Flag | Colour | Blocks entry? |
|---|---|---|
| EXPIRING SOON | light yellow | No — a reminder to renew |
| GRACE PERIOD | yellow | No — membership ended but within the grace days |
| DUES · ৳… | yellow | Only if Refuse members with dues is on in Settings |
| EXPIRED | red | Only if Refuse expired members is on in Settings |
| NO MEMBERSHIP | red | Yes |
| FROZEN | blue | Yes — the membership is on hold |
| NOT STARTED YET | blue | Yes — the membership starts later |
| VISITS USED UP | red | Yes — a limited package has no visits left (one visit counts per day) |
| NOT VALID AT THIS BRANCH | red | Yes — the package does not cover this branch |
| ARCHIVED MEMBER | red | Yes |
Refusing or letting in anyway
When a flag blocks entry, the card has a red border and two buttons:
- Record refusal — the member is turned away; the entry is recorded as refused (red REFUSED).
- Let in anyway — for front desk, manager and owner. The member goes in and the entry is marked as an override. Use it with judgement (for example a member who will pay in the evening); every override shows in the audit log and the attendance report.
On the same card:
- Collect payment — opens the member's profile to take the dues.
- Renew — opens the profile to sell the renewal.
- Profile — the full member profile.
Trainers can look members up and record entries, but cannot let in a blocked member.
Today's list
The right-hand panel Today lists every entry at this branch today, newest first, with time and flags, and the counts "N in · M refused". Click a name to bring their card back (for example to collect dues after they let you know they will pay).
Scanning with the camera
- Press the camera button next to Find.
- Allow camera access the first time the browser asks.
- Hold the QR card in front of the camera. When the code is read, the camera closes and the member card opens.
Press Close camera to stop. "This browser can't read QR codes with the camera" means the browser lacks the QR reader (for example Firefox or an iPhone browser): use a USB / Bluetooth scanner or type the phone number. "Camera permission was refused" — allow the camera in the browser's site settings.
Attendance
Attendance (owner, manager, front desk): "Who came in, when, and who was refused at the desk."
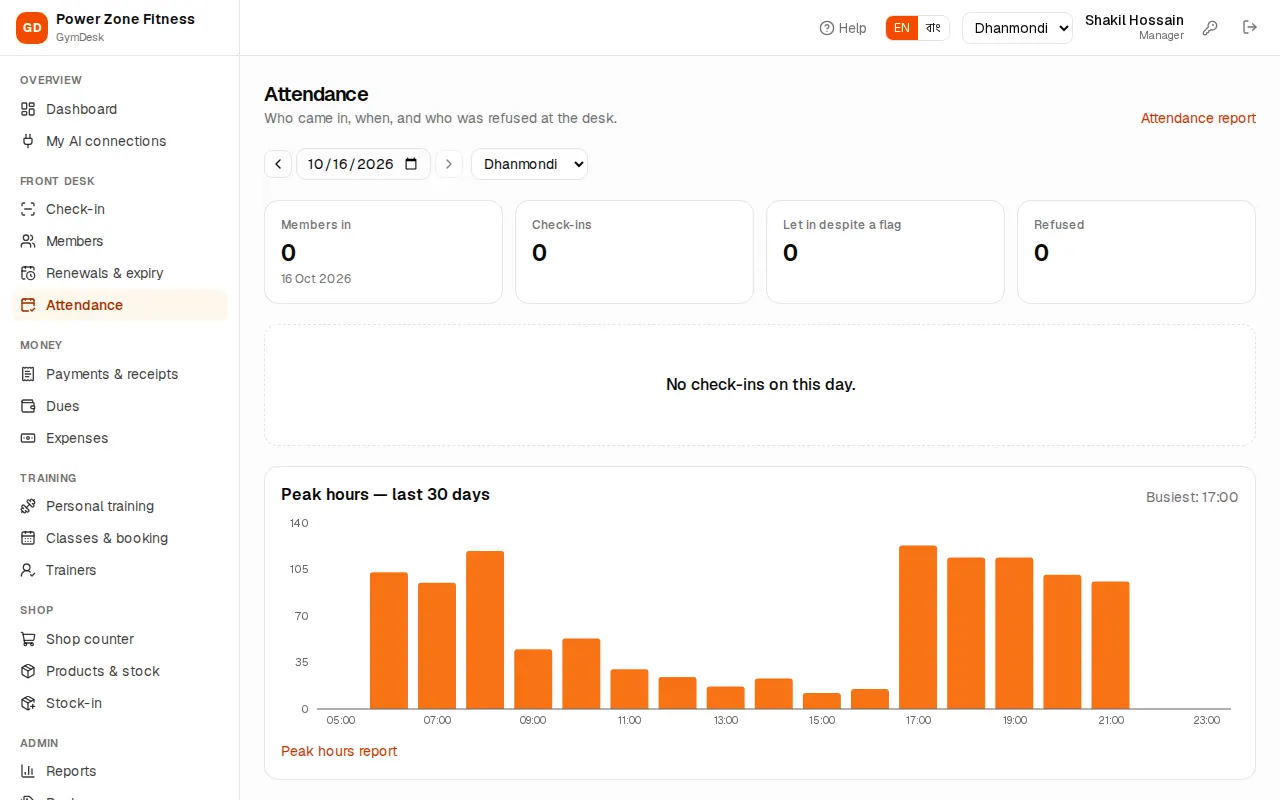
- Pick the day and branch at the top.
- Tiles: Members in, Check-ins, Let in despite a flag and Refused.
- The table: Time, Member, Flags, Result (In, Let in (override), Refused), How (QR, phone, member no., manual), Branch and By (the staff member).
- Peak hours — last 30 days: entries per hour of the day, with the busiest hour, to plan staff and trainers.
Attendance report and Peak hours report open the full reports for any date range (see Reports). A single member's entries are on their profile under Recent check-ins, and members see their own in the portal.